Share
Pin
Tweet
Send
Share
Send
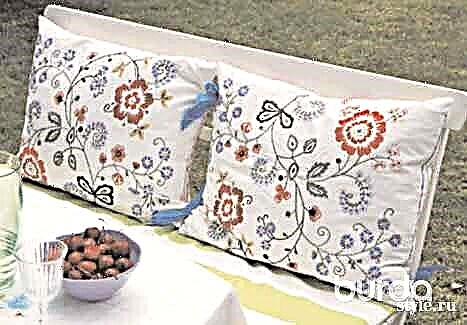
These luxurious accessories will make any furniture comfortable and beautiful - both in the garden and in the house.


You will need:
For each pillow: white linen 65 cm, width 90 cm; threads for embroidery yellow, red, blue and green (from Coats); one edging of suitable color 150 cm long; 60 cm rep ribbon blue; 1 zipper 30 cm long; transferable thermal pencil (from Prym); transparent paper; Scotch; suitable stuffing material; matching sewing threads; hoop; sharp needle for embroidery; pins scissors; pencil.
Performance:
For the back of the garden bench, we sewed two pillows with strings that connect both pillows. Each cover is sewn from one piece of fabric. To do this, cut out from linen linen 2 cuts measuring 82x62 cm each. These sizes include allowances for seams 1 cm wide.
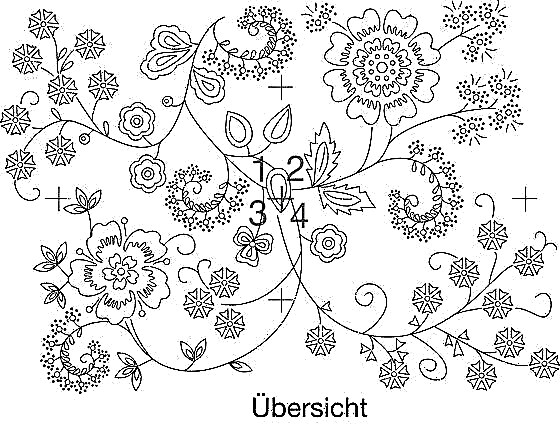
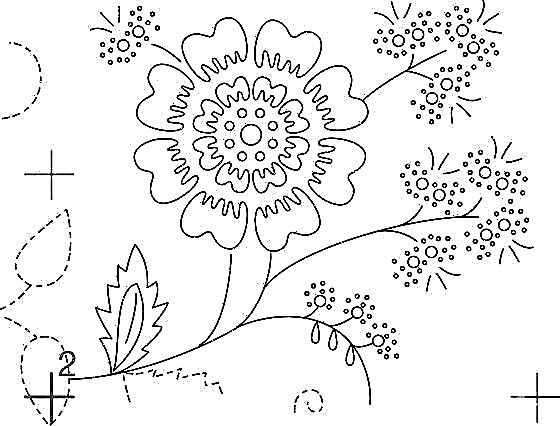
Print motifs 1-4 as patterns for embroidery. According to the photo (see above), combine them into one motive and fix it with tape. Copy all motive lines with a transfer pencil on a sheet of transparent paper of the desired size. If possible, draw with thin lines, sharpening a pencil as needed. Lay down transparent paper with the ink side down in the middle of the front side of the cushion cover and stick with pins. Translate the motive with an iron.To do this, heat the iron in the "wool / linen" mode and place it on transparent paper without shifting, ironing the motif in parts. Remove paper.
Embroider a motif with thread for embroidery in 3 additions (colors, see photo). According to the photographs and drawings, embroider the lines and contours with a stalk seam (Figure a), the petals and leaves with a simple stitch (Figure b). If desired, embroider the middle of the flowers with knots (Figure c). Close the ends of the threads on the inside.
Smooth the finished embroidery from the wrong side on a soft bed with steam.
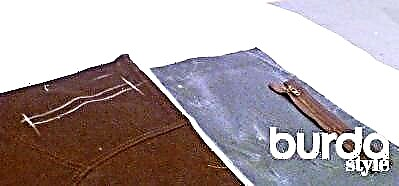
Sew on the contour of the cover with the help of the foot for attaching a hidden zipper. In this case, the thick part of the edging is directed toward the center of the cover, and the edges of the edging lie on the slices. Fold the cover face-to-face to a size of 62x41 cm and grind it with allowances of 1 cm wide. For stitches, grip a 30 cm rep ribbon on one of the short sides. For this, chop the ribbon at a distance of approx. 5 cm near the upper and lower corners so that its end lies on the seam line and the other end points toward the center of the cover.
For the zipper in the middle of the long side of the cover, leave a part of the seam open. To iron out allowances and under them to sew a fastener of a zipper. To invert, open the zipper. Release cover, pull out corners. Case cover and close the zipper.
Sew the second cover in the same way, but sew the ties so that the finished pillows can be knitted.
Attach the finished pillows to the back of the garden bench and secure with ties.
Drawings a-c: stitching and sewing.
a = stalk seam, b = simple surface, c = nodules.
Model from Burda Magazine 06/2008
Share
Pin
Tweet
Send
Share
Send